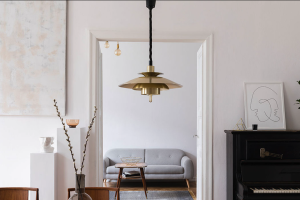
Creating a Calm Living Room with Indirect Cove Lighting
You’re looking to create a more relaxed vibe in your living room, and you’ve heard that indirect cove lighting might be the secret sauce. Absolutely, it can be! The core idea behind using indirect cove lighting for a calm living room is to soften the light and spread it out, eliminating harsh shadows and creating a gentle, ambient glow that’s easy on the eyes. Instead of light directly hitting your furniture or walls and creating bright spots, it bounces off surfaces, resulting in a diffused, serene atmosphere perfect for unwinding.
The Magic of Indirect Light
Think of it like this: direct light is like staring straight at a lamp. It’s bright, sometimes glaring, and can create strong contrasts. Indirect light, on the other hand, is like sunlight filtering through a sheer curtain or moonlight reflecting off a lake. It’s much gentler, more subtle, and doesn’t create those sharp, eye-straining hot spots. This is precisely what makes it so effective for creating a calm environment.
Why Cove Lighting?
Cove lighting specifically is brilliant because it hides the light source entirely. The fixtures are concealed within a ledge or architectural feature (the “cove”) that runs along the perimeter of your ceiling or walls. This means you don’t see the bulbs or the fixtures themselves, only the soft, diffused light they produce as it washes over your ceiling or walls. It’s a sophisticated way to add illumination without adding visual clutter.
What You’ll Need: The Basic Components
Before we dive into the nitty-gritty of installation and design, let’s break down what you’ll actually need to get this done. It’s not overly complicated, but having a clear understanding of the components will make the process smoother.
The Light Source: LEDs Are Your Friends
When it comes to cove lighting, LED strips are the undisputed champions. They’re energy-efficient, long-lasting, and come in a huge variety of color temperatures and brightness levels.
Choosing the Right LED Strip
- Color Temperature: This is crucial for mood. For a calm living room, you’ll want a “warm white” temperature. Look for something in the 2700K to 3000K range. This mimics the cozy glow of incandescent bulbs or candlelight, which is inherently relaxing. Avoid anything too cool (blueish) or too neutral (stark white), as these can feel more clinical and less inviting.
- Brightness (Lumens): You don’t need blinding brightness for cove lighting. It’s about ambiance, not task lighting. Most standard LED strips will provide enough light to wash your ceiling or walls gently. You can always choose dimmable options, which offer even more control over the mood.
- Quality Matters: While you can find cheap LED strips, investing in slightly higher quality ones will pay off in the long run. Better LEDs tend to have more consistent color, better heat dissipation (which extends their lifespan), and are often more robust.
The Fixture: The “Cove” Itself
This is where the magic of hiding the light source happens. A cove is essentially a recess or ledge that conceals the LED strips.
Creating or Utilizing Existing Coves
- Pre-existing Architectural Features: Some homes, particularly older ones or those with a more detailed design, might already have coves built into the ceiling or wall transitions. These are your gold mine! You’ll just need to figure out how to fit the LED strips inside.
- Building a New Cove: If your home lacks natural coves, you can create them. This usually involves some minor drywall or molding work. The most common method is to install a piece of molding (like crown molding or a custom profile) at an angle along the top of your wall, leaving a gap between the molding and the ceiling. This gap is where the LED strip will sit. Another option is to build a suspended ceiling or a false soffit.
- Material Considerations: For building new coves, standard drywall and lumber are perfectly fine. The key is creating a clean, smooth surface for the light to reflect off.
Powering Your Lights: The Power Supply
LED strips need a power supply (also called a driver or transformer) to convert your home’s AC power to the DC power that LEDs use.
Matching the Power Supply to Your LEDs
- Voltage: Most LED strips operate at 12V or 24V DC. Ensure your power supply matches the voltage of your chosen LED strips.
- Wattage: This is really important. You need a power supply with a wattage rating that is at least 10-20% higher than the total wattage of your LED strips. If you have 20 feet of LED strip that draws 5 watts per foot, you’ll need a power supply with at least (20 5) 1.2 = 120 watts. Undersizing the power supply will cause it to overheat and fail prematurely, or worse, be a fire hazard.
Control Systems: Dimmers and Remotes
To truly harness the calming potential of cove lighting, you’ll want to control its brightness.
The Importance of Dimmability
- Dimmer Switches: The simplest way is to use a compatible LED dimmer switch. Make sure the dimmer is specifically designed for LED lights and matches the type of LED strip you’re using (e.g., single color, RGB).
- Remote Controls: Many LED strips come with their own remote control systems, allowing you to adjust brightness, and sometimes even color, from across the room. This adds a layer of convenience and can be very satisfying for fine-tuning the mood.
Designing Your Cove Lighting for Maximum Calm
Simply sticking an LED strip in a pre-existing gap isn’t always enough. Thoughtful design is key to achieving that serene atmosphere.
Strategic Placement: Where to Put the Cove
The location of your cove lighting significantly impacts how the light is perceived and how it affects the room’s ambiance.
Ceiling vs. Wall Coves
- Ceiling Coves: This is the most traditional and often most effective approach. The light washes upwards onto the ceiling, creating a soft, diffused glow that illuminates the entire room without direct glare. This is particularly good for making a room feel larger and more open.
- Wall Coves: You can also install coves along the top of your walls, where they meet the ceiling, but positioned to wash the light down onto the walls. This creates a more dramatic, atmospheric effect and can highlight wall textures or artwork. It can also be a great option if your ceiling has an unusual shape or is too high to effectively illuminate with ceiling-mounted coves.
Perimeter vs. Accent Coves
- Perimeter Lighting: Running cove lighting all the way around the room’s perimeter creates a consistent, even illumination. This is excellent for general ambient light and establishing a peaceful foundation.
- Accent Lighting: You might choose to install cove lighting only on specific sections of the ceiling or walls to highlight architectural features, create a cozy nook, or draw attention to a particular area of the room. This can add depth and interest without overpowering the space.
Light Direction: Upward vs. Downward Wash
The direction in which the light is cast is fundamental to the mood you create.
Upward Wash: The Classic Calm
- Effect: When light is directed upwards onto the ceiling, it bounces and diffuses widely. This softens shadows and creates an ethereal, airy feel. It’s like having a gentle, perpetual dawn or dusk in your living room.
- Best For: This is generally the go-to for creating ultimate calm and relaxation. It’s less likely to cause eye strain and makes the room feel more spacious.
Downward Wash: Intimate Ambiance
- Effect: Casting light downwards onto the walls can create a more intimate and cozy atmosphere. It can highlight the texture of your paint or wallpaper and create pools of warm light.
- Best For: This can be very effective for smaller living rooms or for creating specific zones within a larger space. It can also be used to emphasize artwork or decorative elements on the walls.
Bounce Surfaces: Maximizing Diffusion
The surfaces that the light hits play a huge role in how diffused and soft the final glow becomes.
Ceiling and Wall Finishes
- Matte Finishes: Matte ceilings and walls are ideal. They absorb less light than glossy surfaces and diffuse it more evenly, preventing harsh reflections.
- Light Colors: Lighter paint colors on your ceiling and walls will reflect more light, making the cove lighting more effective and contributing to a brighter, more serene overall feel. Whites, off-whites, pale grays, and muted pastels work beautifully.
- Avoid Glossy Surfaces: If you have a very glossy ceiling or wall in the area where the light will bounce, you might get unwanted reflections or glare. Consider a matte paint if this is a concern.
Installation: Getting Your Cove Lights Set Up
This is where the DIY spirit comes in, or where you might call in a professional.
Planning Your Layout and Wiring
Before you start cutting or sticking, a little planning goes a long way.
Measuring and Cutting LED Strips
- Accurate Measurements: Measure the length of your cove precisely. Remember to account for any corners or breaks.
- Cutting Guidelines: Most LED strips have designated cutting marks (usually indicated by a scissor icon). Cutting anywhere else will damage the strip.
- Connector Cables: If you need to run the strips around corners or over gaps, you’ll use flexible connector cables. Plan where these will be needed.
Concealing Wires and Power Supplies
- Neatness Counts: The goal is to hide the light, so hide the wires too! Plan routes for your wires that are out of sight – behind trim, inside wall cavities (if you’re comfortable with that), or run along the tops of walls where they meet the ceiling.
- Power Supply Location: Find a discreet spot for your power supply. This could be inside a nearby cabinet, in an attic space above, or even within a custom-built housing if necessary. Ensure it has adequate ventilation.
Mounting the LED Strips
Once your cove is ready, it’s time to install the light.
Adhesive Backing vs. Clips
- Strong Adhesive: Most LED strips come with a strong adhesive backing. Ensure the surface you’re sticking them to is clean and dry for the best adhesion.
- Mounting Clips: For extra security, especially in areas that might experience vibration or temperature changes, consider using mounting clips that come with some LED strips or can be purchased separately. These screw into the cove and hold the strip in place.
Positioning for Optimal Light Wash
- Angle of the Strip: Experiment with the angle of the LED strip within the cove. Slightly angling it towards the wall or ceiling can help direct the light more effectively and prevent it from shining directly into your eyes if you happen to look up.
- Even Distribution: Ensure the LED strips are spaced evenly within the cove. If you’re using multiple strips, make sure there are no significant dark gaps between them.
Enhancing Calmness: Beyond Just Brightness
While the gentle glow is the primary driver of calm, there are other factors to consider.
Color Temperature Consistency
The color of your light is a powerful mood setter.
Choosing a Single Warm White
- Unwavering Serenity: For maximum calm, stick to a single, consistent warm white color temperature (2700K-3000K). This creates an uninterrupted, soothing ambiance. Avoid mixing different color temperatures, as this can look jarring and detract from the peacefulness.
- Long-Term Consistency: When buying your LED strips, buy enough for the entire room from the same batch if possible. Slight variations between batches can occur, leading to subtle color differences that might be noticeable.
Dimming Capabilities: Fine-Tuning the Mood
The ability to adjust the light’s intensity is key to personalized relaxation.
The Power of the Dimmer
- From Subtle Glow to Cozy Dim: A good dimmer allows you to go from a softly lit room that’s comfortable for general viewing to a very dim, intimate glow for watching a movie or winding down before bed.
- Finding the Right Dimmer: As mentioned, ensure your dimmer is LED-compatible and rated for the total wattage of your LED strips. Cheap dimmers can cause flickering or a limited dimming range, which is the opposite of calming.
Integration with Smart Home Systems
For ultimate convenience and control, consider smart home integration.
Voice Control and Scene Setting
- Effortless Adjustment: Integrate your dimmable cove lighting with systems like Alexa, Google Assistant, or Apple HomeKit. You can then turn the lights on or off, adjust brightness, or even set specific “calm” or “movie night” scenes with simple voice commands.
- Scheduled Ambiance: Program your lights to dim gradually in the evening or to turn on with a soft glow in the morning, further enhancing a sense of peace and routine.
Common Pitfalls to Avoid
Even with the best intentions, a few common mistakes can trip you up.
The Glare Factor
One of the main reasons for cove lighting is to avoid glare, so don’t accidentally create it.
Light Leaking Out
- Ensure Full Concealment: Make sure the LED strip is completely hidden within the cove. If any part of the strip is visible directly, you’ll get a direct light source that can be glaring.
- Angle it Right: If you’re using a downward wash, ensure the angle of the cove prevents the light from shining directly into the seating area.
Insufficient Brightness or Overpowering Light
Getting the light level just right is a balancing act.
Too Dim: Faint and Uninviting
- Consider the Room Size: For larger rooms, you might need more LED strip length or a slightly higher wattage per foot to achieve adequate ambient light.
- Think About Function: While it’s for calm, you still need to be able to see. If it’s so dim you’re constantly bumping into things, it’s not serving its purpose.
Too Bright: Harsh and Stimulating
- Dimmable is Key: This is where a good dimmer is essential. It’s better to start with a slightly brighter setup that can be dimmed down than to have insufficient light.
- Lower Wattage LEDs: If you find your lights are too bright even at their lowest setting, you might need to use LED strips with a lower wattage per foot, or consider adding diffusion material (though this can reduce brightness further).
Power Supply Overload
This is a critical safety and functionality issue.
Wattage Calculation is Non-Negotiable
- Always Over-Spec: As mentioned before, always add a buffer to your power supply calculation. An overloaded power supply is a fire hazard and will fail.
- Quality Power Supply: Don’t skimp on the power supply. A good quality, appropriately sized power supply is crucial for reliable and safe operation.
By carefully considering these aspects, you can transform your living room into a tranquil sanctuary with the subtle, sophisticated glow of indirect cove lighting. It’s a project that offers both aesthetic appeal and a tangible improvement in your home’s comfort.